


Ever wonder how to use self tanner the right way? You know, so you don’t end up with orange streaks and hands that don’t remotely match your body? I definitely have, especially in the past few weeks. See… it’s winter. And where I live, that means gloomy, rainy weather and temperatures a little too cool to spend all your time outside. It also means that my summer tan is slowly fading away. To me, there are three ways to deal with this:
- Win an all-expenses paid trip to the Caribbean (nice)
- Spend hours baking in a tanning bed (not so nice)
- Use a self tanner (realistically my best bet)
Until someone offers to send me someplace sunny for the next month (any takers?), my options to keep my tan going are tanning beds and self tanner.

Actually, let’s narrow that down to self tanner, because in my mind tanning beds are not an option at all.
Why I Won’t Go Near a Tanning Bed
Have you ever gotten a sunburn? I have. Not pretty. The culprit is UV radiation. The sun’s rays contain two types of radiation (UVA and UVB) that impact your skin in different ways. UVB radiation burns the upper layers of your skin, which can lead to sunburn. UVA radiation gives you a tan by encouraging your skin to produce a pigment called melanin. Even a moderate amount of exposure to UVA and UVB radiation can cause massive problems. Both types of radiation can damage the skin, and both can lead to skin cancer. When you’re out in the sun you can reduce this risk by slathering on some sunblock, but what about when you’re in a tanning bed? Tanning lamps produce both UVA and UVB radiation. You’re probably not going to use sunscreen before you use these beds, so you’re getting a full dose of skin-damaging rays. And, unlike the sun, whose intensity changes based on the season and time of day, sunlamps shine at the same intensity all day and all year round. Here are just some of the problems that sunlamp exposure can cause:- Immune suppression: UVB radiation can keep your immune system from working at its best. This makes you more vulnerable to disease.
- Allergic reaction: If you’re at all sensitive to UV radiation, sunlamps can cause an itchy red rash.
- Eye damage: UV radiation can cause irreversible damage to your eyes.
- Cancer: The big one. When you increase your exposure to UV radiation, you increase your risk of skin cancer. More than 1 million new cases of skin cancer are diagnosed every year, and it’s more and more common among younger people. Tanning beds might have a lot to do with that.
- Tanning causes age spots, freckles, and discoloration
- Tanning causes fine lines and wrinkles
- Tanning can lead to actinic keratosis, scaly red patches on the skin that can be a starting point for skin cancer
- Tanning makes skin, tough, leathery, dry, and rough
Using Self Tanner is a Safe and Effective Way to Keep Your Summer Glow Alive

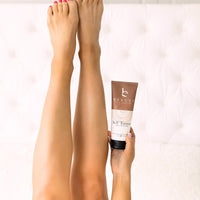
I love self tanner. It gets me through the winter. When you know how to use self tanner, it gives you an even, natural-looking tan without any of that nasty UV business. Using the right self tanner is one of my favorite ways to take care of my skin and myself. It makes me look great, feel great, and actually nourishes my skin instead of abusing it. In order to keep my skin looking just the way I want it, I follow a very specific self tanner routine. As with any skincare ritual, the most important step is the first one: choosing the right product.
How to Choose the Best Self Tanner
You can walk into any drugstore and find a wall full of self tanning products. And you can look at the ingredients list on any of those bottles and find a list full of dangerous and potentially toxic chemicals. Conventional self tanners rely on synthetic colorants and dyes to tan your skin. The base lotions that transports these dyes to your skin also tend to contain questionable ingredients. That’s why I like to stick with natural self tanners.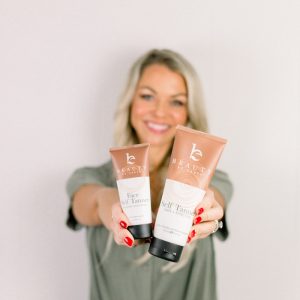
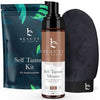
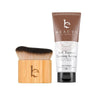
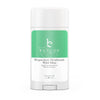
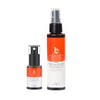
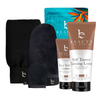
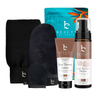
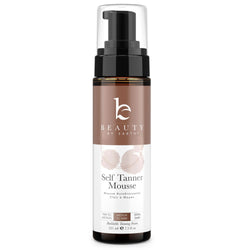
Beauty by Earth’s Body Self Tanner and Face Self Tanner are my favorite tanners. This tanning line sticks to ingredients that nourish the skin while they tan. Here are just a few of the ingredients you’ll find in a great natural self tanner:
- Shea Butter: This rich butter is full of fatty acids that nourish and moisturize the skin. (Learn more about the amazing benefits of shea butter on this fascinating Wellness Mama post)
- Green Tea Leaf Extract: Helps to decrease wrinkles, reduce the speed of aging, and fight inflammation.
- Witch Hazel Extract: Soothes the skin and helps get rid of redness.
- Jojoba Seed Oil: Seals in moisture on the skin, improving moisturization.
The Ultimate 8 Step Guide on How to Use Self Tanner
Step One: Do Everything Else
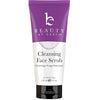
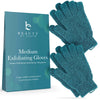
There are a lot of things that can mess with your self tanner if you don’t do them first. Painting your nails, coloring your hair, and shaving your legs can all remove the tanner before it has time to do its work, so make sure you get these tasks done beforehand. …but not too close beforehand. Before I knew how to apply self tanner I didn’t realize that it’s not a great idea to shave right before you use it. I ended up with all of my pores showing up as little orange dots. Not very classy. I definitely recommend waiting several hours after you shave before applying any self tanner.Step Two: Exfoliate
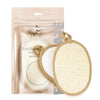
Self tanner has a way of sinking in to dry skin and creating weird little dark patches. You can make sure you skip this problem by exfoliating your skin before applying self tanner. Use a natural exfoliating scrub to slough off any flakes, paying special attention to your knees, elbows, ankles, and other rough areas. Use a gentle exfoliator to make sure your face is clear as well.Step Three: Start From the Bottom
If you start by applying self tanner to your shoulders and torso, you may end up with some weird streaks when you bend over to do your legs. Make sure you get a nice, even tan by starting from the bottom and working up.Step Four: Use Circles
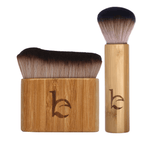
Squeeze a small amount of self tanner (about a teaspoon or so) into a clean hand. If you prefer, you can wear latex gloves. Work the lotion into your skin using a circular motion. I usually apply tanner to my legs, arms, torso, and face, being careful to avoid sensitive areas like my eyes.Step Five: Tread Carefully
Be especially cautious when applying self tanner to areas where skin tends to be loose and dry. This includes elbows, knees, and the areas around your nose and top lip. The skin in these areas tends to pick up more color than the surrounding skin, making it easy to end up with dark spots. It is always a good idea to moisturize these types of areas prior to applying self tanner so you get a more even look. It will also help ensure these areas don't come out darker than everywhere else.Step Six: Wash Up
If you decided not to use gloves to apply your self tanner, wash your hands immediately afterwards. This will keep you from ending up with off-color palms. If you end up with streaks or splotches, don’t fear – rub the area with half a lemon then buff it away with a damp towel. It’ll be like it never happened.Step Seven: Repeat as Needed
You should reach your desired color within six hours. If you don’t, just reapply the following day. I usually end up reapplying every 4-7 days to keep my color consistent, but that number may vary based on what works best for you. Step Eight: Don’t Forget Sunscreen – Self tanner does not protect against UV radiation. If you plan to spend any time in the sun after using a self tanner, be sure to apply sunscreen.And For Visual Learners…
This handy infographic sums up everything you need to know about how to use self tanner:
Over the course of writing this article I have received exactly zero offers to go on vacation someplace sunny. Looks like my self tanner will be getting me through yet another winter. I don’t really mind, though: a good, natural self tanner is one of my favorite ways to care for my skin.


join the conversation
Thanks for your insight— I think applying lotion on areas that could darken more than desired was very helpful. I’m about to apply the self tanner now!!!
I have a tube of beauty by earth, self tanner, that says sunless tanning with clean ingredients, but has no color on it. So I don’t know if it will be for fair to medium or medium to dark? How do I tell?
How long should I wait to shave again after self tanning?
Does this tanner expires if you haven’t used it all winter?
I was doing research on how to PROPERLY apply self tanner, and I have to say that I really sppreciate all the information you shared. I honestly learned a lot, when I didn’t expect much, from my search. :)