


The pools are open, kids are running around carefree, and we all smell distinctively of sunscreen while we chug our iced coffees . . . In other words, it's summer time! And what better time than the summer months to experiment with your hair and trying out new styles that show off your carefree vibe? And for us, that means Braids! Braids are not only trendy and versatile, but they're also cooly practical for keeping your hair off your face and neck during the hot summer months. In this blog post, we will explore seven stunning braids that will elevate your summer look and make you feel like a true beach goddess.
How to Make the Classic French Braid
Chances are, if you were a girl growing up in the USA in the '90's, you learned the classic French braid. This timeless hairstyle can be traced back over 6,000 years to rock art depicting women with braided hair. No doubt our fascination with the French braid is well-earned as it's elegant-yet-functional and easy to learn. Instead of just using three sections of hair like in a basic braid, the French braid technique involves gradually incorporating additional hair from each side of your head into the braid as it travels downwards. This creates a beautifully continuous, woven pattern that is snug against the scalp.
Here's how to make a classic French braid:
- Spray some Sea Salt Hair Texturizer Spray to add texture and grip to your hair.
- Next, divide a section of hair at the crown of your head into three equal parts.
- Cross the right strand over the middle strand.
- Cross the left strand over the middle strand.
- Incorporate small sections of hair from the sides into the outer strands as you continue crossing them over the middle strand.
- Repeat this pattern, gradually adding more hair from the sides, until you reach the nape of your neck.
- Secure the braid with a hair tie, and you're ready to flaunt your chic summer look!
How to Make a Fishtail Braid
A fishtail braid is a beautifully intricate hairstyle that looks like a tightly woven pattern, reminiscent of the bone structure of a fish's tail, hence the name. It's a step away from traditional three-strand braids. Instead, this style uses only two sections of hair, which are divided, then small subsections are taken from the outer edge of each side and crossed over to the other side. The process continues alternating sides, with a new small piece from the outer edge always joining the opposite section.
The result? An incredibly detailed and stunning plait that appears complex but is actually quite simple once you get the hang of it. Fishtail braids can be dressed up or down, worn tightly for a neat, sophisticated look or pulled apart slightly for a relaxed, boho vibe. Whether it's a casual day at work, a formal event, or a day out with friends, a fishtail braid adds a unique touch of elegance and charm to any look.
Here's how to make a fishtail braid:
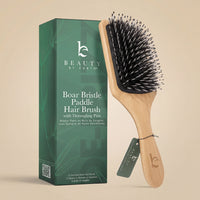
- Brush your hair with a Boar Bristle Brush to remove any tangles.
- Divide your hair into two equal sections.
- Take a small piece from the outer edge of the left section and cross it over to the right section.
- Repeat the same step on the right side.
- Continue alternating sides, taking small sections from the outer edges and crossing them over to the opposite side, until you reach the ends.
- Secure the braid with a hair tie and gently tug at the sides to create a more voluminous and bohemian look.
How to Make a Dutch Braid
Dutch braids (or sometimes referred to as "inside-out" or "reverse" braids), are similar to french braids with one major difference. Imagine your hair intricately plaited to create a raised, 3D braid that stands out, quite literally! Unlike the traditional French braid which weaves strands underneath one another, the Dutch braid technique involves braiding the sections on top of each other. This simple switch results in a strikingly different, standout effect, giving the illusion of a braid that's popping right out from your head! Versatile and chic, Dutch braids are perfect for everything from your morning jog to a glamorous night out. They not only keep your hair secure and tangle-free, but also add a bold, edgy element to your overall look. So, whether you're aiming for a boho-chic vibe or a fierce, warrior-like aesthetic, a Dutch braid can definitely help you make that statement!
Here's how to make a beautiful classic dutch braid:
- Spray a Sea Salt Hair Texturizer Spray for added grip and texture.
- Brush your hair with a 100% Boar Bristle Brush to remove any tangles.
- Gather a small section of hair at the crown of your head and divide it into three equal parts.
- Cross the right strand under the middle strand.
- Cross the left strand under the middle strand.
- Incorporate small sections of hair from the sides into the outer strands as you continue crossing them under the middle strand.
- Repeat this pattern, gradually adding more hair from the sides, until you reach the nape of your neck.
- Secure the braid with a hair tie, and you're all set to make a stylish statement.
How to Make a Waterfall Braid
Ah the beautiful waterfall braid! This stunning hairstyle effortlessly mimics the cascading nature of a waterfall. Picture strands of your hair freely falling down in a mesmerizing stream from an intricate, woven structure at the top - that's the essence of this look. Like the murmuring of water against rocks, this braid gives a gentle, elegant feel to any hairdo, making it a perfect go-to for casual outings, festive occasions, or when you're in the mood for a touch of bohemian charm. Just like a real waterfall, the beauty of this braid is in its flowing, organic design - a cascade of hair that adds a romantic, whimsical touch to your look. Plus, it's way easier to create than it seems.
FYI: If you have thin, straight, or fine hair, this style requires some extra love. A few spritzes of sea salt hair spray will make all the difference in the world. Trust us.
- Spray some Sea Salt Hair Texturizer Spray to add volume and texture to your hair. (The grip from the sea salt spray is crucial for this look as the strands aren't held tightly, unlike other styles).
- Take a small section of hair near your temple and divide it into three parts.
- Cross the top strand over the middle strand.
- Drop the bottom strand and let it fall freely.
- Take a new section of hair from the top, near where you dropped the previous strand, and incorporate it into the braid.
- Repeat steps 4 to 6, continuously dropping the bottom strand and picking up new sections, as you work your way around the back of your head.
- Once you reach the opposite temple, secure the braid with a hair tie or bobby pins.
- The result is a stunning waterfall effect that will turn heads wherever you go.
How to Make a Boxer Braid
A boxer braid, also often called a "double Dutch braid," is a fierce, functional, and fashion-forward hairstyle that has gained significant popularity in recent years. Think of it as two symmetrical Dutch braids running parallel from the front of your head all the way to the back, akin to a pair of train tracks. Starting from your hairline, the hair is separated into two equal parts and each half is then tightly woven into an individual Dutch braid, which, remember, is essentially an inverted French braid.
This creates two distinctive, raised plaits sitting on top of your head, rather than being flat against your scalp, resulting in a bold, standout effect. Boxer braids not only offer a practical way to keep your hair secured and out of your face during intense physical activity (hence the name, originating from female boxers who commonly wore this style), but also make a trendy fashion statement. Whether you're heading to the gym, a music festival, or just hanging out, boxer braids provide a great mix of style, comfort, and durability.
- Part your hair down the middle and divide it into two equal sections.
- Take a small section of hair at the front and divide it into three parts.
- Cross the right strand over the middle strand.
- Cross the left strand over the middle strand.
- Continue this braiding pattern, adding hair from the sides as you go, until you reach the ends.
- Secure each braid with a hair tie, and you're ready to conquer any summer adventure with style.
How to Make a Crown Braid
A crown braid, as the name suggests, is a hairstyle where your hair is braided in a manner that forms a circle, or 'crown,' around your head. It's like your hair is royalty, donning its own majestic tiara! The look is achieved by creating a French or Dutch braid (depending on the desired effect) that travels around your head, starting from one point and ending back at the same spot. The resulting braid frames the face beautifully, and the tail end of the braid is usually tucked away and secured behind the start of the braid, creating a seamless, continuous circle.
Crown braids have an old-world charm to them, evoking images of Greek goddesses or medieval maidens, but they also fit perfectly into modern styles. This hairstyle is perfect for a wide range of events, from laid-back brunches to more formal occasions. Plus, a crown braid is not only a style statement but a practical way to keep hair out of your face while adding an elegant touch to your look. So, if you're going for regal, romantic, or rustic vibes, the crown braid is your perfect hair partner!
Here's how to make a crown braid:
- Take a small section of hair near your temple and divide it into three parts.
- Braid this section of hair, incorporating new sections from the sides as you move towards the back of your head.
- Repeat the same process on the other side.
- Once both braids reach the back, secure them with a hair tie.
- Cross one braid over the top of your head, securing it with bobby pins.
- Repeat the same step with the other braid, tucking the ends underneath the first braid.
- Secure any loose strands with bobby pins, and you'll have an enchanting crown braid fit for a summer goddess.
How to Make a Boho Twist Braid
Absolutely! A Boho Twist Braid, short for Bohemian Twist Braid, is a relaxed and effortlessly stylish hairstyle that perfectly embodies the carefree and romantic spirit of boho-chic fashion. Imagine two sections of your hair gently twisted around each other, creating a loose, free-flowing rope-like structure. It's not as tightly structured as a traditional braid, giving it a more natural, whimsical look. This style often incorporates smaller braids or pieces of unbraided hair to create a more layered, textured effect. Sometimes, you might even see accessories like beads, feathers, or hair rings added to the mix, further enhancing the boho vibe.
One of the best parts of a Boho Twist Braid is its versatility – it can be a full head hairstyle, a half-up-half-down look, or even a side braid, based on your mood and the occasion. Whether you're headed to a music festival, a casual day out, or even a beach wedding, a Boho Twist Braid can add that perfect touch of easy-going charm and chic to your look.
How to make a boho twist braid:
- Spray a Sea Salt Hair Texturizer Spray all over to add texture and grip to your hair. You're going to want this spray's added grip for your strands to hold this hairstyle, believe us. 😘
- Take a small section of hair at one side of your head, near the temple, and begin twisting it towards the back.
- As you twist, incorporate small sections of hair from the sides, similar to a French braid.
- Continue this twisting pattern until you reach the opposite side of your head.
- Secure the twist with bobby pins.
- Gently pull at the twist to create a more relaxed and undone look.
So Many Summer Days! So Many Braids!
This summer, experiment with these beautiful braided hairstyles. Enjoy the process of mastering these looks and let your hair shine with effortless style all season long! With these seven stunning braided hairstyles, you can effortlessly elevate your summer look and stay stylish even in the hottest months of the year. Whether you prefer classic elegance or bohemian chic, there's a braid for every taste and occasion. Don't be discouraged if your first attempts aren't flawless. Braiding takes practice, and with time, you'll become a pro. Can't wait to see what you can do!
Sea Salt and Shiny Tresses,
Jenny


